Originally published on fastradius.com on August 1, 2022
Injection molding is a popular and versatile manufacturing process that enables companies to produce high-volume production runs for a relatively low cost-per-part without sacrificing quality. It’s highly repeatable and capable of producing strong components that meet strict mechanical and dimensional requirements.
When companies need to produce a plastic part with thin walls, such as certain car parts or cell phone cases, they can turn to thin wall injection molding. However, you’ll need to be particularly careful when designing products with thin walls, as thin wall injection molding introduces new challenges. In this article, we’ll go over the basics of thin wall injection molding, its common applications, and some injection molding design tips so you can start your journey off on the right foot.
What is thin wall injection molding?
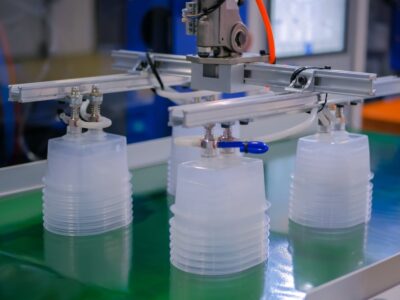
Thin wall injection molding is a specialized form of injection molding that enables manufacturers to create thinner and lighter parts without sacrificing structural integrity. By opting for thin wall injection molding over traditional injection molding, companies can save material, boost productivity, achieve a lower cost-per-part, and reduce shipping-related fuel usage and carbon emissions.
Since thin wall plastic parts have less material to cool, cycle times are much faster, reducing delivery lead times. In fact, a significant reduction in wall thickness can sometimes cut cycle times in half, helping companies get products in customers’ hands faster and saving on operating costs. Plus, since thinner walls mean less plastic, companies can save money when it comes to materials and, in the case of containers and packaging, leave more empty space for the product.
However, thin wall injection molding comes with a few challenges. For one, the injection process is more complicated. You need higher pressure and faster molding speeds to fill all the thin cavities with molten material, avoid freezing off, and ensure the part comes out as intended. For example, while a component with standard walls can be filled in two seconds, that same part with 25% thinner walls may need to be filled in just one second. Additionally, you may need to take extra steps and carefully design gates to ease part ejection.
Common uses of thin wall injection molding in manufacturing
Manufacturers often turn to thin wall injection molding when it comes to plastic packaging, as it can be used to create everything from food-safe packaging to medical device packaging. Other common uses of thin wall injection molding include cell phone components, plastic lids and containers, electronic housings, syringes, and medical device components. Even the automotive, construction, appliance, and aerospace industries use thin wall injection molding for parts and component assemblies.
Thin wall injection molding design tips and tricks
Thin walls often lead to material flow problems, which can cause unformed areas. Other common issues associated with thin walls include uneven cooling, warp, cracks, cosmetic texture inconsistencies, and weak knit lines or fracture points.
To avoid these problems and create the best possible part:
Pay attention to your material
Material choice is always important for injection molding, but it’s essential when creating parts with thin walls. Some materials, such as polycarbonate (PC), are sticky, making filling molds with thin walls difficult. However, certain thermoplastics will flow more easily through narrow sections of a mold, such as high-density polyethylene (HDPE), low-density polyethylene (LDPE), nylon (PA), and polypropylene (PP). Liquid silicone rubber (LSR) also fills easily, though it may increase the risk of flash along your mold’s parting lines.
There’s no one-size-fits-all material for thin wall injection molding, so consider your part’s geometry and application needs when comparing materials. Also, try to choose a material that won’t accelerate mold wear when injected at high speeds.
Consider your mold material
In addition to thinking about your product’s material, you’ll need to carefully consider your mold material. While P20 steel is often used in conventional injection molding applications, it may not be strong enough to withstand the high pressures, wear, and erosion associated with injection molding parts with thin walls. Instead, you’ll need a more robust material, such as 718, H-13, D-2, or another tough steel.
It’s important to note that you may end up paying 30%-40% more for a tool made of a robust material compared to one made of P20. However, that additional cost can be easily offset by the tool’s increased performance and longevity.
Have uniform wall thickness
If possible, ensure your design has uniform wall thickness throughout. This will allow for even cooling and help prevent warping, sink marks, flow lines, and short shots. For best results, keep your wall thickness a minimum of 0.9mm (0.0354”) or greater.
Add ribs or gussets
You can include ribs in your part design if you need to strengthen your part or increase its rigidity. While ribs are generally half the thickness of the wall they support, your ribs may be as thick as your wall if your wall is less than 1mm thick. However, sink marks and read through may be visible where the rib intersects the wall.
Incorrectly designed ribs can result in warp, sink marks, voids, and breakage, causing more trouble than they’re worth. To avoid these problems, design ribs to be 60% of wall thickness or less, keep base radii small, space ribs apart by three times the wall thickness, and include 1°of draft or greater.
If you want to reinforce your thin rib wall without making your ribs thicker, add gussets (or cross-support ribs) and follow the same set of guidelines.
Include radii
Sharp corners are never good in injection molding, as they can cause parts to stick to the tool during the ejection process. They also require more pressure to fill and can result in voids if there isn’t sufficient pressure, so it’s important to include radii and round out internal and external corners and edges. Since the mold cavity is incredibly narrow in thin wall plastic injection molding, avoiding sharp corners and edges is even more critical to ensure a smooth flow of material and a clean ejection.
Pay attention to the temperature
Mold temperature is key to the injection molding process and can drastically impact how the final product looks and feels. A warmer mold allows the injected plastic to flow more easily, resulting in better surface quality.
When it comes to cooling, place non-looping cooling lines directly in your core and cavity blocks to keep your mold’s surface temperature as consistent as possible. Additionally, try to increase the amount of coolant flow through your tool, rather than decreasing coolant temperature, and ensure the temperature difference between your delivery coolant and return coolant is less than 10° F.
Design gates with care
Since thin wall injection molding involves higher injection speeds and pressures, gates should be larger than the part’s walls to help minimize gate wear and material shear. This will also help prevent or eliminate freeze-off from occurring before packing is achieved. If your gate connects to a thin wall with a pinpoint, hot-drop, or sprue, you can reduce stress at the gate and improve the filling process by including a gate well.
You may also want to increase the draft angles of reinforcing ribs, edges, and bosses, as thin-walled plastic parts experience minimal shrinkage.
Creating thin-walled parts with SyBridge
Thin wall injection molding not only helps companies reduce part weight and material consumption, but it can also help reduce costs and cycle times. However, you’ll need to follow these tips and tricks to avoid material flow problems, uneven cooling, and other problems.
An experienced manufacturing partner like SyBridge can help you through the injection molding process, from design to production. When you work with us, we can help you design injection mold tooling and manufacture quality parts quickly and cost-effectively. Plus, by uploading your part file to our website, your design will go through instant DFM analysis to identify potential manufacturability issues. Contact us today to get started on your next injection molding project.
